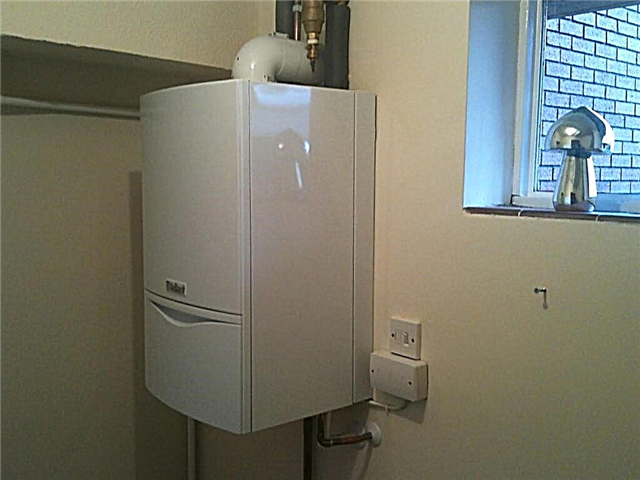
In winter, ice jams can form in the outer branches of the water supply system due to a sharp decrease in air temperature and freezing of the soil. To avoid this, it is necessary to organize heating of the water supply system using one or more effective technologies.
In our article, we describe all methods that exclude the formation of ice in water pipes. We will tell you how to properly maintain communications in cold weather and prevent equipment breakdown. Independent masters with us will find instructions on the installation of thermal insulation and heating systems.
Water insulation options
The problem of thermal insulation and heating of pipes arose due to seasonal changes in temperature and, as a result, the appearance of a freezing topsoil.
In winter, the freezing depth reaches 0.8-1.8 m on average, and in the most extreme northern points of Russia - up to 3.5 m.

Digging deep, but narrow trenches for laying water pipes is extremely irrational. If a breakthrough occurs, repair work will be complex and time consuming.
Together with digging ditches at great depths, you will have to equip a head - to install a caisson, where pumping equipment is usually located. These are costly and irrational measures, for the implementation of which it is necessary to attract special equipment.
To save money, to make maintenance of the water supply system easier, it is laid at a shallow depth, using various means of insulation - from heat-insulating material to a heating cable.

Heat loss table. The thickness of the insulating material depends on the diameter of the pipe. Accordingly, heat loss is calculated taking into account both parameters.
Often, the method of heating an underground water pipe is chosen based on installation conditions and considerations of economy. Sometimes it is more beneficial to combine two different technologies. For example, a cable is mounted all over the pipe, including the end lowered into the well, and the part located in the ground is insulated with a polystyrene foam sheath on top.
Method # 1 - using insulation
The traditional and most popular method of heating pipes buried in the ground, as well as “air” water pipes, is mechanical insulation, which is produced using special materials.
The shell is selected based on the conditions of a particular region and particular features of the geological situation, for example, soil aggressiveness or the presence of high groundwater.
There are a number of requirements for materials. They should have such qualities as:
- low thermal conductivity - the key to energy efficiency and savings;
- wear resistance, long term of operation without loss of basic qualities;
- resistance to organic and chemical substancesas well as soil microorganisms and bacteria;
- lack of deformation at high humidity and low temperatures.
Typically, manufacturers accompany the product with a list of technical specifications that must be considered when choosing alternative options. There are cases when the shell of extruded polystyrene foam is much more rational to use than expensive polyurethane sprayers.
Popular heaters:
Image Gallery
Photo from
Thermal paint performs several functions: it creates reliable insulation, insulates, protects against rust and fungi. Most often it is used for drawing on pipes located in basement floors, caissons, basements, attics - that is, in unheated rooms
The substance is applied using a spray gun and creates a reliable insulating sheath, "uninteresting" for rodents and protecting pipes from the penetration of external moisture. It is rarely used in the private sector, but in the industrial sector it can accelerate insulation work by 5-6 times
Despite the decrease in interest in glass wool as a heater, it is still used, given the low cost of the material itself and installation work. The lack of material is friability, low density, which causes compression and increases thermal conductivity
The basalt base is denser than glass wool, therefore it retains more heat and is less deformed. However, it needs additional insulation, therefore, on top of the plate or shell are covered with a material that prevents the penetration of water - glassine or foil insulation
Most often used to isolate products up to 10 cm in diameter. They do not let water through, they are resistant to biological and chemical environments, they retain their shape and characteristics when the ambient temperature changes. But they need extra protection - too soft
Synthetic material has such properties as strength, self-extinguishing, environmental friendliness. Absolutely does not absorb moisture, including from the air, resistant to penetration of steam. It is used at facilities when increased environmental and sanitary safety requirements are imposed.
Fragile and friable, in comparison with expanded polystyrene, material, but is used if it is necessary to reduce the cost of thermal insulation. It is a double-sided shell, which must be fixed with adhesive tape throughout the entire line
In terms of density, thermal conductivity, strength and durability, it surpasses a similar material - polystyrene. They will retain their shape even under mechanical pressure, it has light weight and low cost. The shell is very easy to mount. For the installation of a heating cable, products with grooves are produced
Acrylic-based thermal insulation paint
Sprayable insulation polyurethane
Glass Foil Wrap
Mineral basalt wool
Foamed polyethylene sleeves
Foam rubber for insulation
Cylindrical foam shell
Shell polystyrene for insulation
All of these materials are relevant, they can be easily found on sale. Preference should be given to insulation with low thermal conductivity, high strength.
It is easier to install one that does not require an additional tool, has a light weight and small volume, and lends itself well to processing.
Method # 2 - thermal insulation with air
This method is used in the communal sphere and industry, the arrangement in the country of a protective air cushion is associated with difficulties. The technology consists in supplying warm air to the channel in which the water supply is located. From above the pipe is closed by any type of thermal insulation.

The method is rational for large industrial facilities where you can dig volumetric trenches under pipes and supply heated air using special equipment
This technology has options. For example, if the diameter of the pipe is small, then it is placed in a similar product, but with a larger diameter. Such an arrangement does not allow the main with water to directly contact the soil, and therefore to cool. In addition, a small space is created between the walls through which heated air circulates.
The disadvantage of the method is the impossibility of applying for a water supply system launched on top of the earth. It is relevant only for communications located in the ground, preferably below the freezing level.
Method # 3 - high blood pressure
There are standards that establish the magnitude of the pressure in the networks for various types of water supply devices. For example, for high-rise buildings, the optimal parameters are 4-4.5 bar, while in private houses they can be more or less.

Typically, the equipment of a pumping station supplying water from a well is designed for 1.5-2.7 bar. Installation of a pressure switch in the factory - 2.8-3 bar
The maximum working pressure for the water supply systems of private houses is considered to be 6.5-7 bar, but such indicators are rare, more often they do not reach 3 bar. To protect the water supply from freezing, the pressure in the system is increased, say, from 3 to 5 bar.
The main condition is the installation of special equipment, since not everyone is able to withstand such a pressure.
More often the increase in pressure is used by public utilities, the owners of country houses use it extremely rarely. If the strength of the system allows, the pump is turned off for the winter season, and the pressure is raised to 5 bar.
Method # 4 - heating using electricity
Installation of a heating cable is considered the most effective way of all active. The heating principle is simple: an electric current passes through a wire installed inside or outside the pipe, and increases its temperature by converting electricity to heat.

The electric current must generate the amount of heat necessary to maintain the temperature above 0 °, so that the water in the liquid phase does not begin to crystallize and turn into ice
The heating cable is subject to special requirements. It must be protected as much as possible from the effects of external mechanical irritants, moisture. The shell must be durable, without holes and defects.
Consider two types of cable that are actively used to heat pipes that supply water to private homes.
Option 1 - Resistive Cable
The advantage of the product is a specially selected alloy of metals with high resistance, which causes a large amount of heat generated. Of the two types of cable - single-core and two-core - the second option is more practical.
1-core requires a loopback circuit. This means that during installation, both ends must be brought to the power source. With 2-core it is simpler: the first end is connected to a power source, and the second is “closed” by putting on a contact sleeve.

Two cores perform different functions: one serves as a heat source heating the water supply, and the second provides conductivity. But some cables have both cores
The conductors are protected by a polymer sheath, often multi-layer. In addition, a grounding screen covers them from above, and from the outside - a durable heat-resistant PVC insulation.
Why choose a resistive cable? It has great heat dissipation, in other words, it heats up very much and transfers heat to the water pipe. It can be fixed along the entire length of the highway, wrapped around the connecting nodes and flanges.

If the pipeline has a complex structure with many fittings, you need to take the cable about 2-3 times longer so that it is enough for the winding
Additional advantages of the resistive option are affordable cost and ease of installation. All preparation and installation operations can be performed independently.
The disadvantages include the purchase of additional equipment: automatic machines, sensors, control units. It is believed that the end sleeve should be factory - to guarantee the safety and proper operation of the heater.
Option 2 - self-regulating heating wire
The principle of operation and cable design are fundamentally different from the first option. Self-regulating systems are recognized as more economical and easy to install.
Cable structure:

A matrix on semiconductors is enclosed between two conductive veins, the main purpose of which is to generate heat. The amount of heat depends on the ambient temperature.
In terms of energy consumption, this type of cable looks ideal. As soon as the temperature of the air or pipe decreases, it increases energy consumption and generates more heat, and with increasing temperature, the conductivity drops sharply.
Efficiency is also increased by heating individual sections of the water supply. If the samreg is laid along the street and inside unheated rooms, then the "street", cooler sections, it will heat more. The more vulnerable the heated zone, the more heat the cable generates.
Advantages of self-regulating systems:
- energy saving;
- heating efficiency;
- distribution by "zones";
- comfortable length.
Unlike resistive cable, which is sold ready-made and has a certain length, samreg can be cut as conveniently. Usually, the cut points are indicated on the shell, the interval between which is 20 or 50 cm.
There is a drawback too - heating of extended sections flies a pretty penny. If a low-power cable can be bought at a price of 60-75 rubles / m, then the cost of a high-quality and powerful cable reaches 300 rubles / m and higher.
Recommendations and installation instructions
It is not as difficult to close the water supply with thermal insulation as to connect heating cables, therefore, we will consider the technical nuances of installation, relating specifically to electrical equipment.
Outdoor installation of heating cable
Fastening along the outer surface of the pipe is often practiced when it is necessary to heat open sections of the water supply located in the basement, basement, and caisson.
There are two ways to fix a wire on a pipe:
- stretch along the surface along the entire length;
- wrap in a spiral.
The first option is more economical and practical if the cable power is enough to heat the pipe. In particularly cold areas, you can use the second method, but the wire consumption will increase.
Mounting occurs in the following order:
Image Gallery
Photo from
First, we fix the cable pointwise, in several places, so that it rests on the pipe and does not move out. For this, you can use electrical tape. If there are difficulties with a circular winding around the pipe, then you can use construction tape, cutting it into small pieces
We fix the fixed cable on top with a self-adhesive tape, without leaving empty areas. It is better to take foil-coated self-adhesive, which performs three functions: reliably protects the wire, firmly fixes it on the pipe and evenly distributes heat over the entire surface
In order for heat from the heating cable to enter the pipe, and not into the environment, we put on a heat-insulating sleeve from above. Inexpensive and practical option - special “fur coats” made of foamed polyethylene, lightweight, flexible, easy to install
The final touch is fixing the heat-insulating material. Additional fixation with screeds will make the insulation more reliable and prevent heat loss. Instead of screeds, you can use pipe clamps or electrical tape, which is not afraid of sunlight
Step 1 - fixing with electrical tape or tape
Step 2 - self-adhesive fastening along the entire length
Step 3 - thermal insulation with a heating “sleeve”
Step 4 - fixing the insulation with screeds
This is the easiest way to mount the heating cable.
Recommendations for the device:
- To heat a polypropylene water pipe with a diameter of up to 32 mm, it is enough to fix the cable along one side - which one does not matter. However, if it is necessary to insulate the sewer, the wire is fixed exclusively from below.
- If there is a choice of insulation, then you need to take a thicker one. Overheating of the self-regulating cable does not threaten, but heat loss will significantly decrease. The thicker the coat, the less Samreg will spend electricity, the greater the savings.
- Self-adhesive aluminum is the best material for fastening to the pipe. Acrylic adhesive does not break down under the influence of heat, which is evenly distributed over the entire heated surface.
- The sun's rays destroy some types of insulation and fasteners, so for open areas it is better to choose black clamps and adhesive tape that does not respond to UV radiation.
If the cable is mounted not in a straight line, but in a spiral, then the insulation will occur according to the same principle - putting on a "coat" and fixing with clamps. Without a heater, part of the energy will be wasted on heating the air.
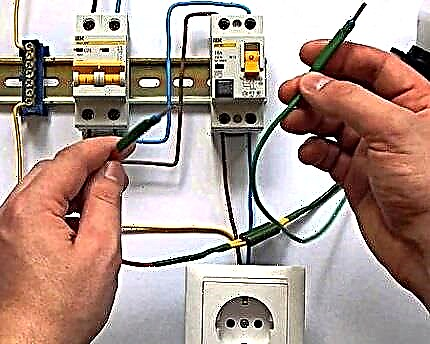
The nuances of connecting a self-regulating cable
It is not practical to pull the wires to the pipe from the shield, so the samreg is connected to the power cable, which, in turn, is simply plugged into the outlet if necessary. For work, you will need a building hair dryer, a knife, a set of heat-shrink tubes for crimping and sleeves for connecting contacts.
It should be remembered that electrical equipment in a humid environment becomes more dangerous, therefore, special attention must be paid to tightness.
Connection photo instruction:
Image Gallery
Photo from
Step 1 - Preparing the Power Cable
Step 2 - cutting the self-adjusting cable
Step 3 - release the matrix from protection
Step 4 - Stripping of Conductors
Step 5 - mounting the contact sleeves
Step 6 - Casing the first clutch
Step 7 - connecting the grounding conductors
Step 8 - Casing the second clutch
As you can see, there are no difficulties with the internal installation of the cable, just all the manipulations must be performed very carefully and consistently.
When choosing a power cable, the location of the outlet must be considered. If it is next to the pipe, you can buy the shortest product, but more often you have to purchase a 4-5-meter cord.
It remains to squeeze the end of the samreg:
Image Gallery
Photo from
As in the previous description, remove the protective sheath from the screen by about 1.8-2 cm, then cut the braid from the wires
We bite a small corner to reduce the likelihood of contact between the veins, and select two heat shrinks, different in diameter
We put a small tube only on the gray shell and heat it. Until it cools down, clamp the end with pliers, cut off the excess
We put a large shrink in diameter on the cable so as to close the remaining gap, heat and clamp the tip
Step 1 - preparatory work
Step 2 - processing the edge of the cable
Step 3 - Casing the first clutch
Step 4 - Casing the second clutch
With a hermetically sealed end, the cable is fully operational. So that the water pipe does not freeze, it remains to fix the samreg along the entire length of the highway, insulate it and insert the plug into the outlet.
In some cases, the installation of an external cable is considered unsuccessful, for example, if it passes through floor slabs or concrete blocks of a well. Then apply the internal installation.
If it is better to use a product of flat type for external heating, then a special cable with a round cross section and especially reliable waterproofing is suitable for internal heating.

Installation diagram of the heating cable inside the pipe. To install, you need a tee, a set of plumbing accessories and an stuffing box with a rubber seal
Indoor installation of a heating cable requires special care and compliance with certain rules. For example, you cannot run the cord through the nodes where threaded connections protrude from the inside - sharp edges can damage the protective sheath.
Video # 1. Outdoor installation instruction:
Video # 2. Detailed description of the indoor installation:
Video # 1. Practical use in summer conditions:
If you choose the right method of warming the water supply and perform installation work in compliance with the rules, then there will be no problems with pipes in the winter. The insulation of the trunk laid in the ground should be taken care of in advance, and open areas can be insulated at any convenient time..
Want to talk about how the water main was insulated in your own suburban area? There is information on the choice of material and technology for its installation, which is worth sharing with visitors to the site? Please write comments in the block below, ask questions, post a photo on the topic of the article.